Paste a bitmap image into a screen
To paste a bitmap image into a screen, copy it to the clipboard and then paste it directly into the Screen worksheet.
Please note that by default, using this method to add an image to a project screen will embed the image data in the screen file. This keeps everything in a single file, which is more convenient in some situations, but it increases the screen file size each time you reuse the image and it is also less flexible than linking to an external image file. Nevertheless, if this is what you want to do, then proceed with the task below.
If this is not what you want to do, however, then you have two other options.
First, if you want all bitmap images to be linked as external files, then you should first select the option Save pictures in separate files, in the project settings. When that option is selected and you paste a bitmap image into a screen, the image is automatically saved as a separate file in your project folder and then placed as a Linked Picture object in the project screen. For more information about the option Save pictures in separate files, see Project Settings: Viewer.
Second, if you want only a specific bitmap image to be linked as an external file, then you should not paste it into the screen. Instead, you should manually place it as a Linked Picture object. This leaves you the ability to paste and embed other bitmap images, according to the default settings.
| Action | Save pictures in separate files… | |
|---|---|---|
| …is selected | …is not selected | |
| Paste image into screen | Image is placed as a Linked Picture object | Image is placed as a Bitmap object |
| Link to external image file | Image is placed as a Linked Picture object | Image is placed as a Linked Picture object |
To paste a bitmap image into a screen:
- Open the desired image in an appropriate image editor, such as Microsoft Paint.
- Select part or all of the image, either by using the Select tool in Paint or by pressing Ctrl-A.
- Copy the selection to the clipboard, either by using the Copy tool in Paint or by pressing Ctrl-C.
- Switch to the development application, and then make sure that you have the correct Screen worksheet open for editing.
- On the Home tab of the ribbon, in the Clipboard group, click Paste, or press Ctrl-V. The bitmap image is placed as a screen object.
- Click and drag the object to where you want it to be positioned in the screen. Also, click and drag the object’s handles to resize it, if necessary.
- Double-click the screen object. If Save pictures in separate files is selected in the project settings, then the bitmap image was placed as a Linked Picture screen object. Skip the remaining steps of this task and instead proceed to Link to an external image file.
On the other hand, if Save pictures in separate files is not selected, then the bitmap image was placed as a Bitmap screen object. Proceed with the remaining steps below.
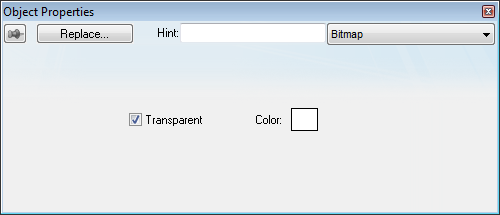
The Object Properties: Bitmap dialog is displayed.
Figure 1. Object Properties: Bitmap

- If you want some part of the picture to be transparent to the screen background and other objects, then select a transparent color:
- Select Transparent.
- Click and drag the tracker on the screen object until it is positioned over a sample of the desired transparent color. The tracker is an additional handle on the screen object that initially appears just inside the bottom-right corner of the object. Moving the tracker on the object does not move or resize the object itself.
- Close the Object Properties dialog.